.JPG)
June 2017
Floor Steering Cabin
The floor of the steering cabin looked from the beginning not up to my expectations as well as that some of the wood was damaged and a part was rotten in the corner of the deck drain.
I had some teak left over from the installation of the teak deck as well as some Birch for placing between the teak planks.
As can be seen from the next picture the repairs to the boat also did not add positive to the condition of the floor.

First step was to remove the wood placed on top of the ply wood which was the original floor of the steering cabin.
This wood small pieces was glued onto the ply wood and while removing it some of the plywood was damaged as well while some other parts cam off very easy.

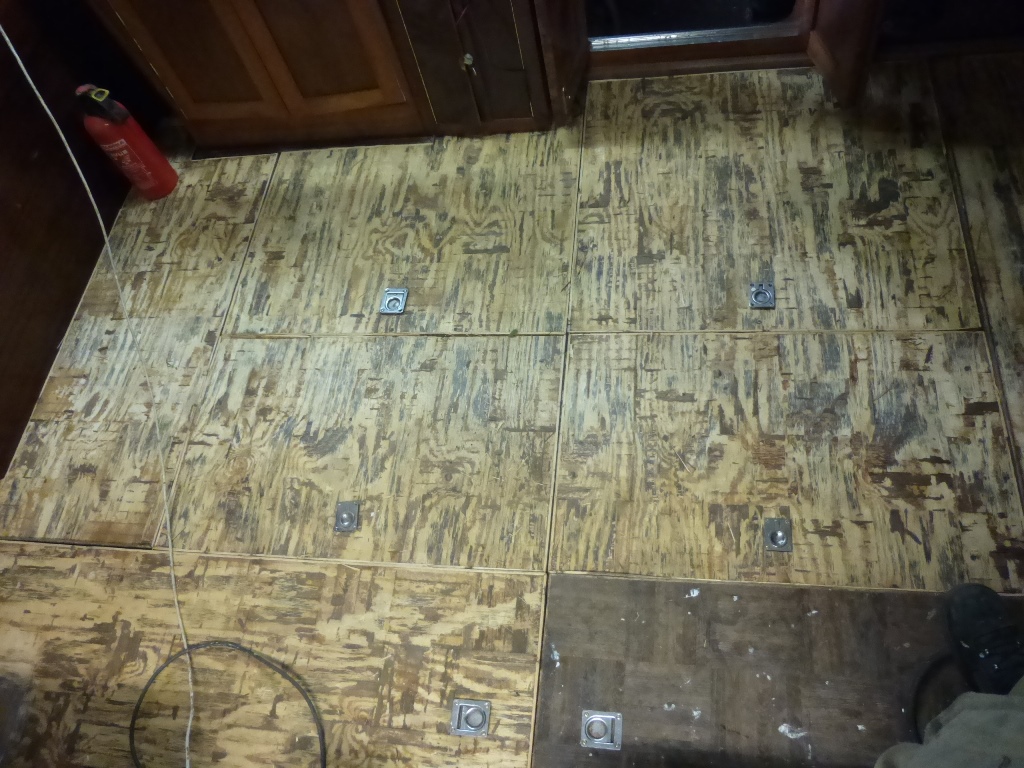
Eventually the whole floor looked like a plywood floor, interesting concept for a floor in a boat.
When all the wood was removed and the wood on the site of the hatches it was noticed that there were screw holes in the hatches which gives me the impression that the original floor has been one with rubber mats and brass rims around the hatches.
One of the reasons that the wood was removed on the site of the hatches was that the hatches did not line up which I did not like and wanted to improve. As can be seen from the next picture with the removed wooden strips on the site of the hatches rather large gaps were created,

New Hardwood strip were glued onto the hatches and the hatches were modified as much as possible to get better lines in the floor of the hatched when installed. As can be seen from the next picture some of the hatches were not cut straight resulting that they needed to be modified. Left hatch with the new rims on the side while the right hatch did still have the old rim.

Next picture as well shows the difference in the hatches between length and width where they should have been exactly the same.
Right hand bottom corner with the new strip on the side of the hatch.

The first step in the finishing of the hatches with new teak was to install on all hatches the wooden piece on the side of the hatches while aiming that all lines would match up, more or less t\hatches of the same seize having the same outside diameter.


The plywood hatch was covered in epoxy glue which was colored close to the color of the teak, this to make sure that if the glue was coming out between the planks that it would not stick out as white epoxy glue. The teak planks and birch strips were placed in the exact same as dry fitted and laid next to the epoxy covered hatch to make sure that they would be fitted in the same position as dry fitted.


The hatch was covered with 100% epoxy with a toothed cam to make sure that the teak planks could be pushed into the glue as well as that with a toothed cam an equal layer of glue is applied
First two hatches finished and as can be seen some colored glue has been added on top to close any gaps if they are between the teak and the birch strips. This is not an issue since the hatches needed to be sanded to end up with a flush floor, Teak planks were made with the help of a circular saw and were not all exactly the same thickness. Although not easy to notice from the below picture the new hard wood trim pieces on the side of the hatches were kept higher than the actual thickness of the glue and the teak planks, this to come to a smooth hatch in the end.

Some of the planks needed to get cut in the length to be able to fit as closing plank on a hatch.
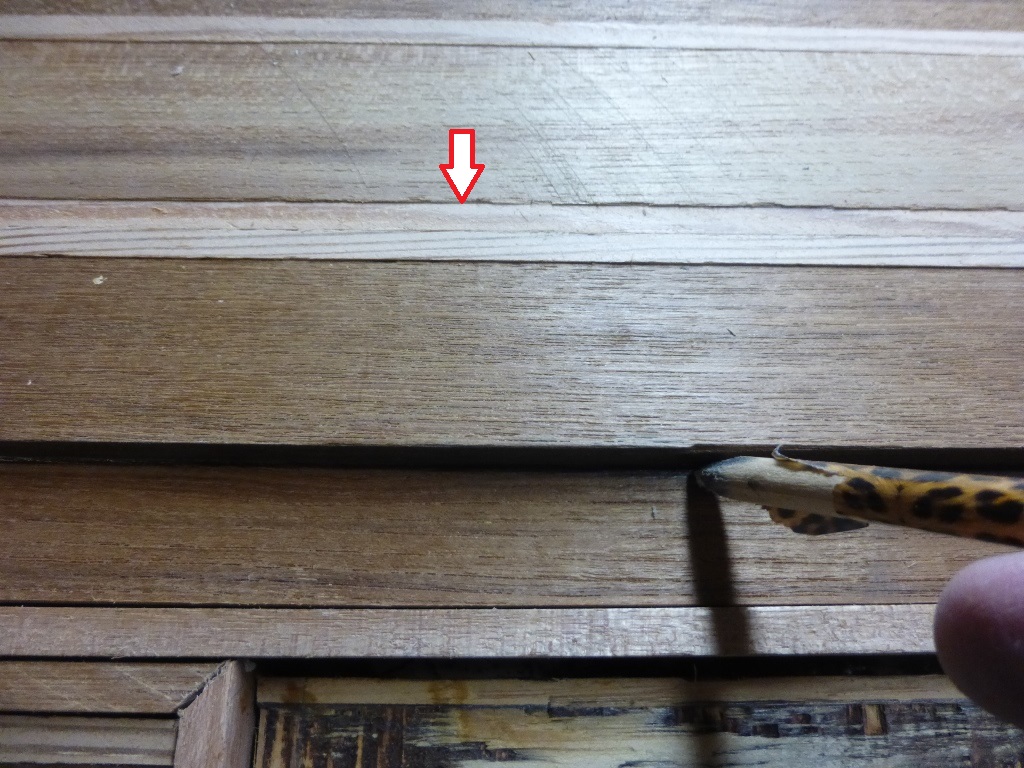
To make sure that the closing plank would have a tight fit the other planks were put in position with small pegs to push them hard against each other and the rims of the hatch.

Then the plank which needed to be cut in the length was marked with a sharp pencil where it needed to be cut, as can be seen two strokes of birch were placed to make sure that the correct with of the plank would remain after the cutting of the plank.
Slowly and diligent continuing the installation of the teak planks the floor started to show the way I wanted to have it as an end product, this type of work requires quite some time and one should not expect that this type of work is completed in a day or two.

Eventually the whole floor was completed and sanded flush not only each hatch but also between the hatches themselves . As can be seen although not 100% perfect the lines between the hatches do line up much better than before I started with this upgrade.

After the sanding and cleaning the hatches were not varnished but covered in several layers with oil , in my case I used Owatrol Deks D-1, not D-2 since this will make the deck slippery when wet
As can be seen a the teak directly does get its color after applying a single layer.

After the floor was in one layer of oil the hatches were finished with installing the rings for lifting them, also here time was taken to place them in such a way that the hatch could be lifted at one side in the middle while ate the other side they would line up.

In the end the deck in the steering cabin looked as one would expect from an old wooden classic boat,

The one thing left was to place sound insulation at the inside of the hatches , I placed not only sound insulation but also sound absorption.

No comments:
Post a Comment